Jewelry Day 28, 5/8/2018
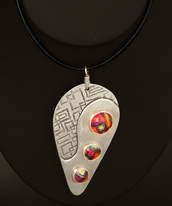
Layered Abstract Project
Leaning Objectives: Students will learn how to texture metal and use it in an abstract, two layered piece with either riveting or sweat soldering.
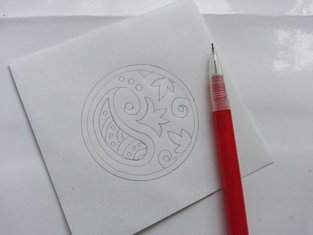
- Begin with 5 designs. These can be any kind of ornamentation you would like. Final design should be drawn to scale with notations on the texturing method to be used.
- Consider how this will hang, or attach. Design that as well.
- Feel free, if you are riveting, to add a 3rd layer that includes a found object. Broken toys, computer parts paper etc.
- Begin cutting out blanks. Plan for larger than you actually need so you can cut out the best part of the pattern or texture. Use scrap metal if you can. This is a great way to use that up.
- Anneal the metal to make it malleable enough to take the impression (either rolled or hammered).
- Find or make your rolling texture or sand and either add resist or sharpie to create your texture.
- Add etched pieces to the bath or roll texture.
- Cut out your actual pieces file, and sand to 600/
- Solder or rivet
- Buff and polish
|
|
|
Artist Analysis due May 1st
Jewelry day 16, 4/19/2018
Lesson Objective: Students will give meaningful feedback to peers with direct suggestions to help improve their work or to facilitate the process of working.
Steps for a TAG Critique:
1. Students start the process by writing the word “TAG” down the left side of a sticky note. Please write your name across the back of the note.
2. Please place your in-progress artwork on your work area.
3. Please pick up your pen or pencil and sticky notes and leave your artwork at your seat.
4. I will play music as you walk around the room, viewing the artwork as you pass by.
5. When the music stops, you should sit down at the closest artwork, being sure to not choose your own.
6. Please, then respond to the three letter prompts on their sticky notes according to the artwork that is in front of you
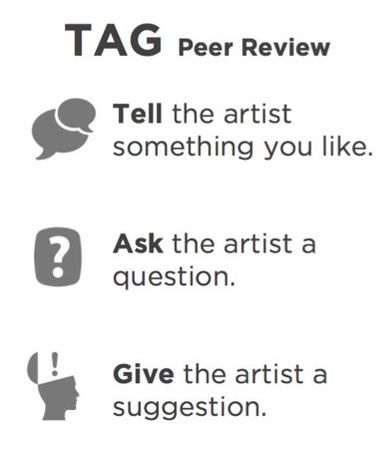
TAG is short for:
Studio Time/Soldering Demos and Practice
Bracelets Due April 27th
Steps for a TAG Critique:
1. Students start the process by writing the word “TAG” down the left side of a sticky note. Please write your name across the back of the note.
2. Please place your in-progress artwork on your work area.
3. Please pick up your pen or pencil and sticky notes and leave your artwork at your seat.
4. I will play music as you walk around the room, viewing the artwork as you pass by.
5. When the music stops, you should sit down at the closest artwork, being sure to not choose your own.
6. Please, then respond to the three letter prompts on their sticky notes according to the artwork that is in front of you
TAG is short for:
- T – Tell the artist something you like.
- A – Ask the artist a question.
- G – Give the artist a suggestion.
- Will I use this feedback? Why not or how?
- Something I saw while walking around that I found interesting/cool/weird/usable.
Studio Time/Soldering Demos and Practice
Bracelets Due April 27th
- Cut, file and sand to at least 400grit every piece.
- Shape the base metal.
- Practice soldering a ring then some wire
- Begin soldering your final
- Pickle, solder, finish
- Jump rings and clasp
- Turn in with anti-tarnish tab, grade sheet in ziplock bag
- Reflect on, what did you learn about design with this project? If you had to do it again, what would you do differently?
Completed Pierced Projects
Jewelry day 12, 4/11/2018
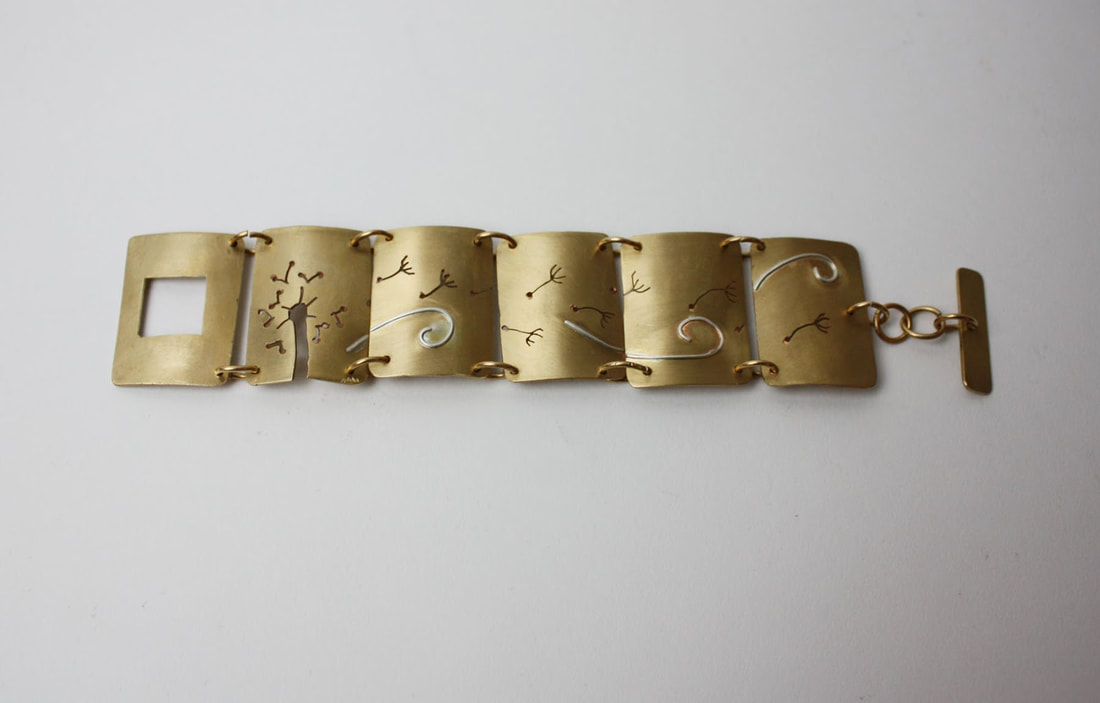
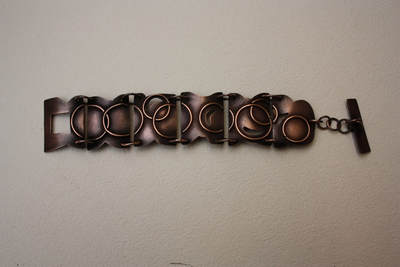
Video - Complete a review of the art of Thomas Mann
forming- the process of shaping metal primarily through the use of dapping blocks and different shaped mallets or hammers.
Agenda -
- What inspires his work? What do you think inspires your own?
- What unique way does he use form and line to create something personal?
- How does layering add to his work?
forming- the process of shaping metal primarily through the use of dapping blocks and different shaped mallets or hammers.
Agenda -
- Think about your sources of inspiration and use it to design a bracelet that demonstrates shape and movement
- Draw 5 designs with three separate pieces of metal. These pieces will be linked together and combined using hand made chain work.
- Designs due on Friday, April 13th
- Artist Inspired Bracelets will be Due Tuesday, April 24th.
|
|
Jewelry II- Work on an Artist Inspired Locket/Box Design with a lid with a hinge
- Look through the handout on making a locket, watch the video on soldering hinges
- Draw five designs, these should be inspired by a painting or photo you love
- Designs due on Friday, April 13th
- Hinged box will be Due Tuesday, April 24th.
Jewelry day 9, 4/5/2018
Jewelry 2:
Jump Ring steps:
- Begin watching the 4 part video series on making a bezel. You will use this to bezel set your "stone" onto your work.
Jump Ring steps:
- Pick the metal wire you wish to use.
- Find something round, which you can wrap the wire around. The handle of a file or a center punch work well.
- Wrap wire as many times as you need rings plus one more.
- Use the angle nippers flat side toward the wire you wish to use, and cut across the top.
- Turn nippers around and repeat.
- Cut the cord to about 30 inches long
- Tie each end around the cord in a simple knot, ensuring the cord is running through the knot.
- Get a ziplock bag, an anti-tarnish tab and a rubric
- Self-assess with explanations
- Fold assessment and put all pieces in the bag and into the turn in basket.
Jewelry day 8, 4/4/2018
Please review the slide show below and complete an artist analysis by Friday, 4/6. Instructions and guiding questions are on the slides.
Jewelry day 6, 4/2/2018
Learning Objectives: Today students will learn how to finish their metal work to achieve a polished, professional final piece.
Agenda:
Agenda:
- Review the rubric
- View videos on sanding and filing
- Studio time.
Jewelry Day 5 3/30/2018
Learning Objective: Students will learn the process of providing feedback and responding to feedback to improve upon design process.
Language Objective: Students will use the elements and principles of design as well as tools and methods to assist their peers and on their personal reflection.
Peer Review process:
Each student will have a blank piece of paper upon which they will draw a "T-chart" labeled with the headings "I like" and "I wonder". They will leave their started project and designs on the table with their chart. They will then wander the room and provide feedback at least 3 of their peers that they do not know. When they return to their seats they will write a reflection on the feedback they received. Students may then begin working on their projects.
Students will write:
- One thing I really like about your design/project is....
- One thing I wonder about....
- On your reflection: what thoughts or ideas inspire how you will move forward? What did you see in the work and designs by your peers that may help you make your own work stronger?
Jewelry Day 3 3/28/2018
Complete sawing and piercing practice
Learning Objective- Students will learn the basic tools and basic skills for cutting or piercing metal using a jeweler's saw, bench pin, and flexi-shaft tool for drilling holes.
Students will begin to design their 2 pierced projects.
Agenda:
Learning Objective- Students will learn the basic tools and basic skills for cutting or piercing metal using a jeweler's saw, bench pin, and flexi-shaft tool for drilling holes.
Students will begin to design their 2 pierced projects.
Agenda:
- Collect any outstanding homework and syllabi
- Begin design process
- Explain Assignments.
- Begin Design process
Jewelry 2
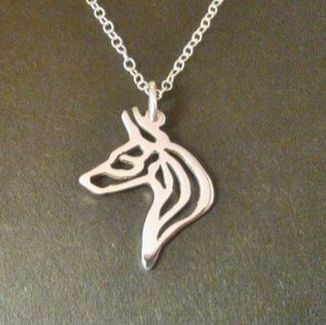
Saw Piercing Assignment:The saw piercing assignment consists of cutting two designs from sheets of metal, (copper or brass), with a jewelers saw. The First Design will fit into an oval or round shape. The Second Design will have its own shape. This process will give you the skills required to use of some basic jewelry tools. Designs must be original. Craftsmanship, design, and the quality of the finished work, are the primary criteria for grading your work.
|
Tools:
|
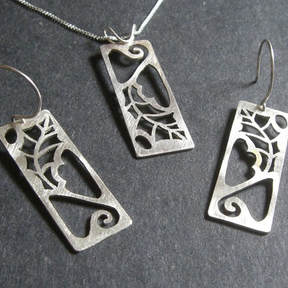
Step 1: 10-12 beginning design concepts for both pendants. One design should fit into an oval, or round shape. The other design can be its own shape. NO BIGGER THAN 1 1/2 X 2 INCHES. These will be reviewed for credit. LEAVE ENOUGH SPACE BETWEEN PIERCED AREAS AS TO NOT CUT OR BUFF THROUGH THE METAL FROM ONE SPACE TO ANOTHER. Include a minimum of three piercings within the shape.
Step 2: With the instructor, select one design for your final. Upon finalization of drawings, ideas to the instructor and receive materials.
Construction Process
Step 2: With the instructor, select one design for your final. Upon finalization of drawings, ideas to the instructor and receive materials.
Construction Process
- Glue paper drawing on metal with rubber cement.
- Punch the negative spaces with the awl and drill holes in metal. There should 3 three saw pierced areas within your design.
- Saw inside first then outside edges with jewelers saw.
- Support work with bench pin and C-clamp by securing to table top.
- After all sawing is complete file all edges with either a large half-round file or small needle file.
- Sand with wet-dry sandpaper start with 320, then use 400, and finally use 600
- Buff using Red Rouge
- Polish using polishing cloth
- Clean in the sonic cleaner to remove all grease
- Attach finished piece to leather cord using a link
Jewelry Day 2 3/27/2018
Saw Piercing and Critique
Learning Objective- Students will learn the basic tools and basic skills for cutting or piercing metal using a jeweler's saw, bench pin, and Fordom tool for drilling holes.
Language Objective- Work in groups to answer questions about a piece of jewelry.
Agenda-
Learning Objective- Students will learn the basic tools and basic skills for cutting or piercing metal using a jeweler's saw, bench pin, and Fordom tool for drilling holes.
Language Objective- Work in groups to answer questions about a piece of jewelry.
Agenda-
- First Critique Practice- Work in groups at your table and grab a jewelry magazine to share. Pick one jewelry design and answer the following questions individually.
- Describe two different elements in the design, and draw the main shapes and textures. (Elements of Art- line, value, shape, space, color, form, texture)
- What design principles did the artist use to create the jewelry piece?
- What do you see repeated in the design?
- Describe how the artists used elements to create a well balanced piece.
- What is the emphasis in the design?
- Jewelry I - What do you want to learn to make in this class?
- Jewelry II - List a few techniques the artist used to create the piece of jewelry.
- Bench Pin: This is used for filing, sanding, sawing, and any other work you do with your metal. It is attached onto the edge of the jewelry bench or table you use. This allows you to file or saw a piece of metal and have room to move your tool around and still hold onto the metal. Below is a link to many different used bench pins.
- A piercing saw is a type of saw commonly used in jewelry making on sheet metal. It is usually used on softer metals as the saw is delicate. http://www.dave-cushman.net/bee/piercingsaw.html
- Flexible Shaft Tool- A power rotary tool. It is similar to a Dremel tool found in woodworker shops. The tool system is a simple rotary motor that has a hand piece which can handle many different attachments. The user holds the hand piece with the desired attachment tip and operates the motor with a foot pedal.
